
The following content is adapted from the Dada Mail Manual. The Dada Mail Manual is available through the purchase of Pro Dada.
Support Dada Mail by purchasing Pro Dada!
Professional installation is available.
Experimental, Semi-Auto Advanced Installation
Semi Automated Advanced Installation
There's no true installer for Dada Mail that is included with the distribution, but you may be able to have Dada Mail set most of itself for you.
This is an experimental and alternative installation instructions to the, Advanced Installation, but will give you a very similar outcome. It doesn't work on all hosting account setups, but if it does, it may save you some time. It also doesn't require exceptional technical knowledge, so we are going to base it on the Basic Installation instructions - with a few changes.
Step #1 Download/Upload Dada Mail onto your hosting account
Follow Steps #1, #2, #5, #6 and #7 in the Basic Installation instructions of Dada Mail. Do not do steps #3 or #4. We're going to try to get Dada Mail to configure itself.
If you skip steps #3 and #4 and visit Dada Mail in your Web Browser, you should see the following screen:
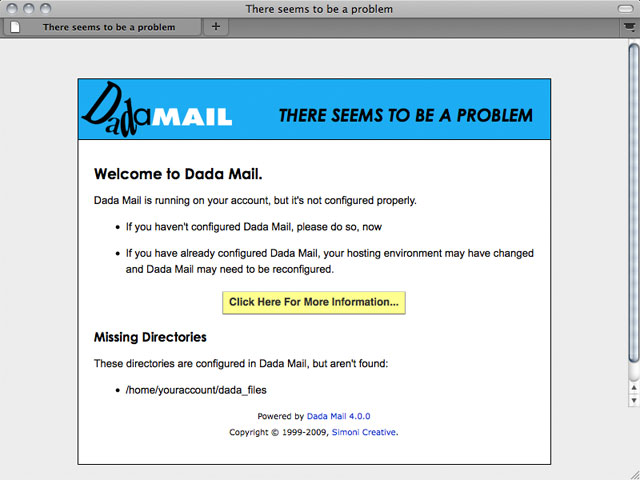
Dada Mail, complaining that it has not been
configured.
Step #2 Access Your Setup Configuration
Click the button that says,
Click Here For More Information...
Doing so will bring you to a screen that looks like this:
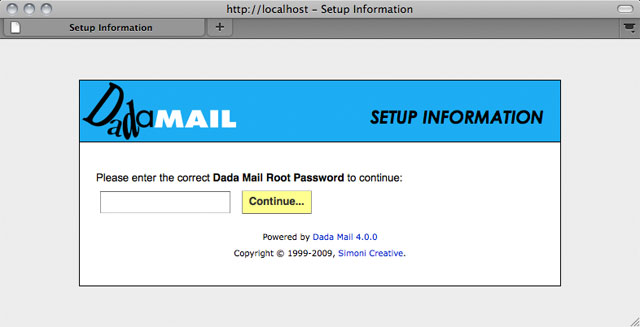
Dada Mail, asking for your Dada Mail Root Password to access
your Setup Information.
Since you haven't configured anything, the default Dada Mail Root Password will be used, which is simply,
root_password
Go ahead and enter that in the textbox and click, Continue.
Doing so will bring you to a screen that looks like this:
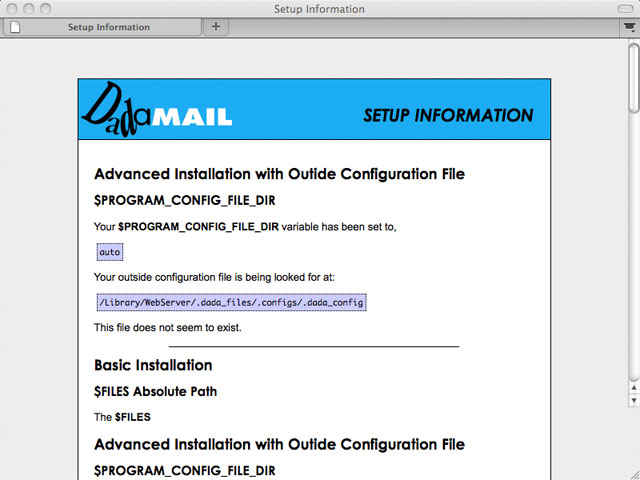
The, "Setup Information" Screen
A few things to notice - one is that the,
$PROGRAM_CONFIG_FILE_DIR variable is set to,
auto. The, $PROGRAM_CONFIG_FILE_DIR is
the Config.pm variable you usually set in an
Advanced Installation. This directory is supposed to hold the
outside configuration file.
This screen also has a path to where it wants the config file to be, but it's also saying that this file does not exist. Funny, Dada Mail can look for it, but it can't make the file it needs... or can it?
Step #3 Auto-Setup Dada Mail
If you scroll down further on the screen, you'll see similar information and a option to Auto-Setup Dada Mail!
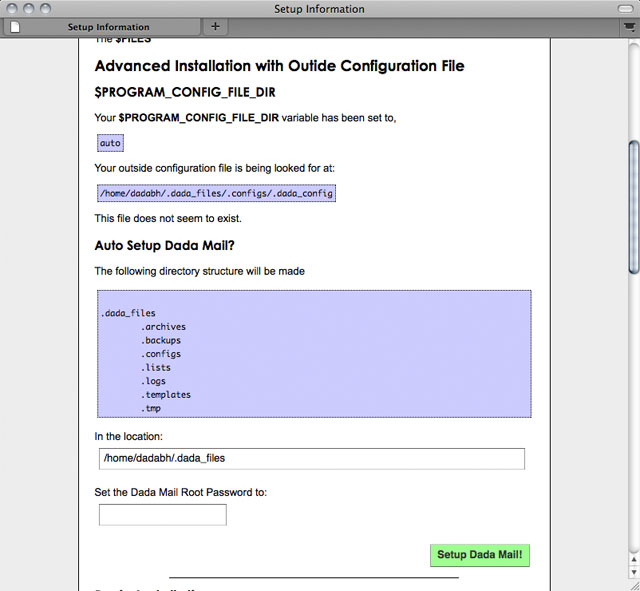
The, "Auto-Setup" option.
All you need to do is fill out the Dada Mail Root Password you want to use and click, Setup Dada Mail!
Did It Work?
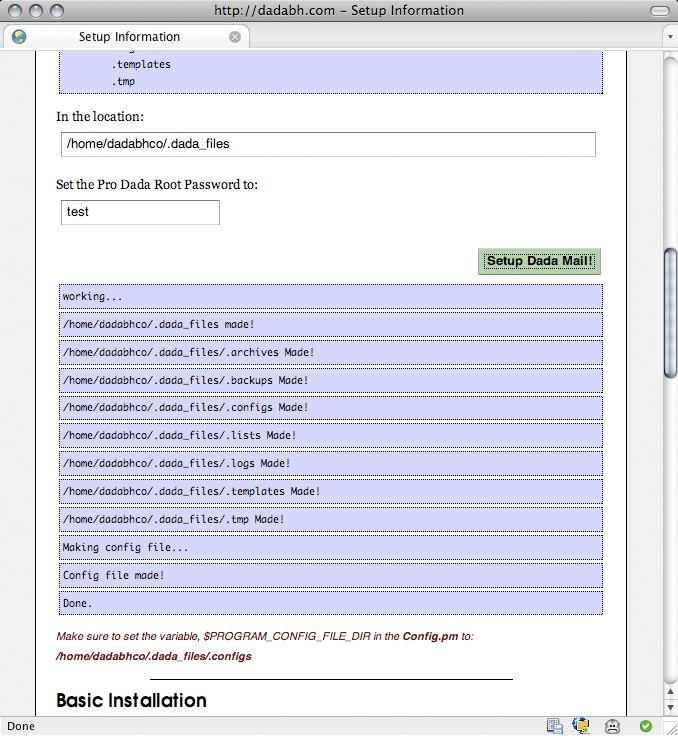
If auto setup worked, you'll get a message like the
above
If the Auto-Setup worked, you should see a message similar to what's shown in the above screenshot.
To make sure, go back to the default screen of Dada Mail. If everything worked correctly, you should see the Congratulations screen:

Congratulations! Auto Setup Worked!
If you see the above screen, you're all set. You can confirm that everything was set up by filling out the form located under the, Program Configuration heading on that same screen:
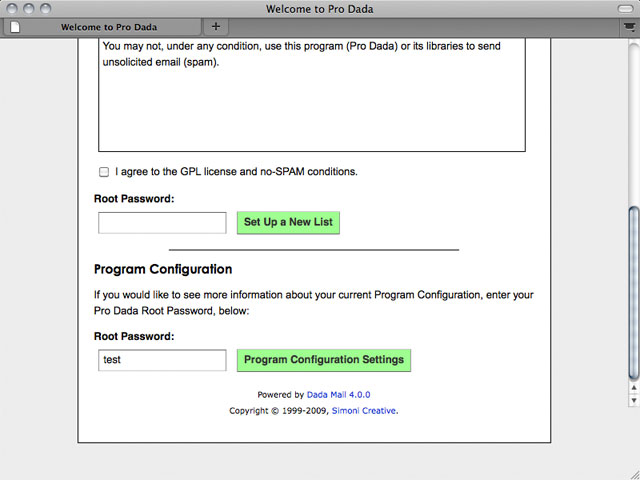
Accessing the, "Setup Information" screen again
When the screen refreshes you should see that Dada Mail can find the outside configuration file now and then shows the contents of the file:

The, "Setup Information" screen now knows about the new
outside config file
You can also then navigate to the newly created,
.dada_files directory and see the outside config file
named, .dada_config in the, .configs
directory.
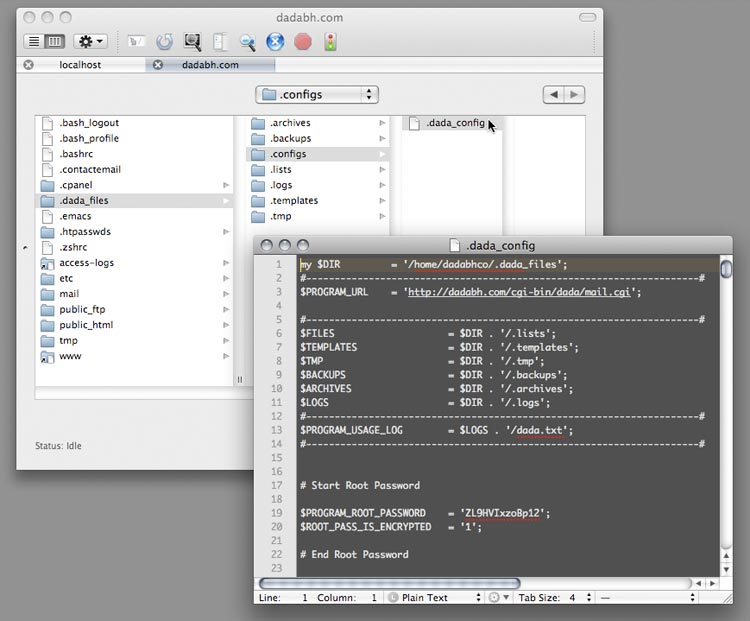
Navigating to where the auto-install has placed the needed
files/directories
You can then, if you wanted to, make additional global configuration changes to this outside configuration file.
Nothin' to it.