

Magic User Templates
Magic User Templates
Magic User Templates allow you to easily skin Dada Mail's user-facing design and layout to match your website's existing design.
It's the easiest way to fully integrate Dada Mail into your website.
Magic User Templates can most easily be configured using Dada Mail's including Installer, and is an additional feature available in Pro Dada:
https://dadamailproject.com/purchase/pro.html
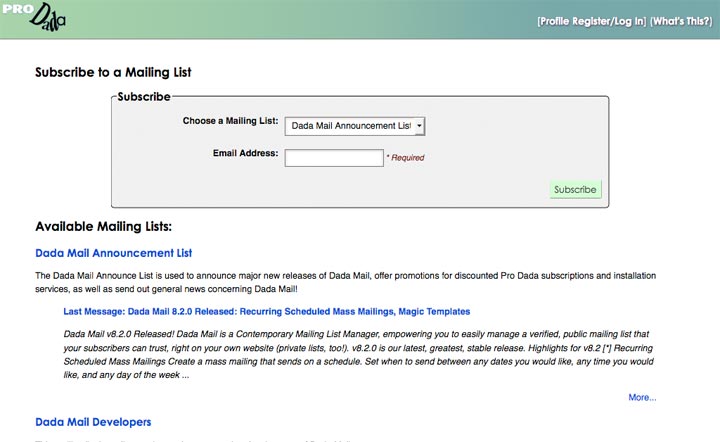
In this doc, we're going to go over some of the options available, and how we configured Magic User Templates for our own install of Dada Mail Here's what Dada Mail looked before, with it's default design,
and here's the result of using Magic User Templates,
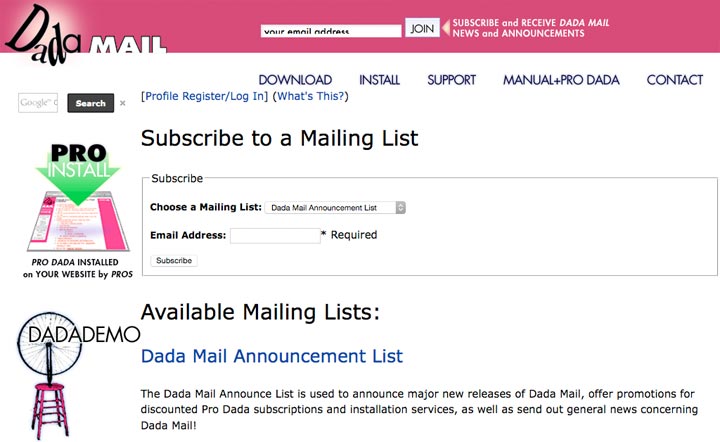
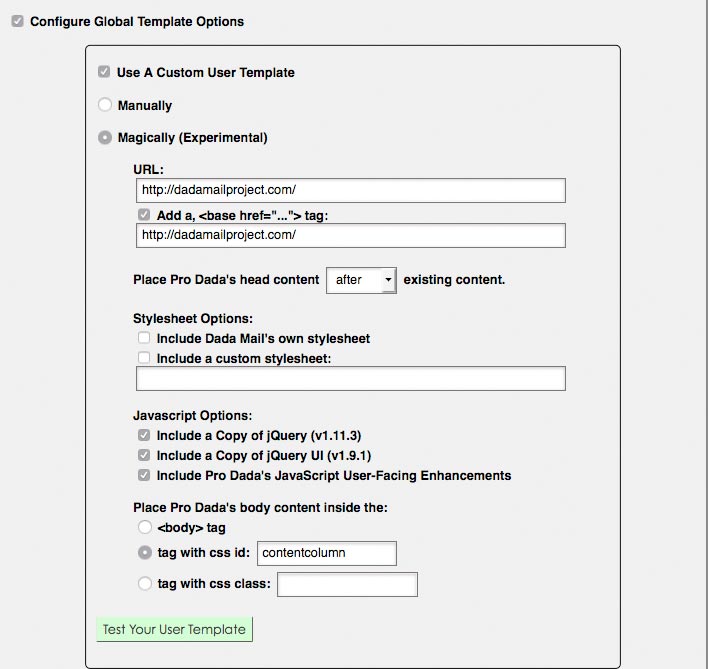
The design of Dada Mail matches exactly the rest of our site. Rejoice! For reference, here are the options we used to generate what you're seeing above:
For a listing of all the options available, and a complete explanation of what they do, see the docs on Magic User Templates, in the Advanced Configuration with the Dada Mail Installer docs,
These options are reflected in the installation's .dada_config file, if you decide you would like to edit them directly, without the installer:
    #---------------------------------------------------------------------#
    # Template Options
    $TEMPLATE_OPTIONS = {
        user => {
                enabled        => 1,
                mode           => 'magic',
                manual_options => {
                    template_url => '',
                },
                magic_options  => {
                    template_url         => 'https://dadamailproject.com/',
                    add_base_href        =>  1,
                    base_href_url        => 'https://dadamailproject.com/',
                    replace_content_from => 'id',
                    replace_id           => 'contentcolumn',
                    replace_class        => '',
                    add_app_css          =>  0,
                    add_custom_css       =>  0,
                    custom_css_url       => '',

                    include_jquery_lib    => 1,
                    include_app_user_js   => 1,
                    head_content_added_by => 'push',
                }
        },
    };
In this doc, we're using v8.3 of Pro Dada - the options may be slightly different in the version of Dada Mail you're running.
First, we checked the options, Configure Global Template Options, Use a Custom User Template, and selected, Magically. This will configure Dada Mail to use Magic User Templates.
We're going to base our layout of Dada Mail based on Dada Mail's homepage at, https://dadamailproject.com/, so that's what we're going to type into the textbox labeled, URL:.
We're also going to check the option, Add a, <base href="..."> tag:, to keep images and links working correctly and use that same URL, https://dadamailproject.com/ for what the base href should be.
You'll see the results of those options in the sourcecode of the default screen of Dada Mail,
<base href="https://dadamailproject.com/" />We've unchecked the option, Include Dada Mail's own stylesheet, as the resulting formatting of the text on the page clashed with the rest of the site's design.
If we wanted to further style some of the text that the site's stylesheet doesn't cover, we could do that by checking, Include a custom stylesheet, and writing our styles in that file. But for now, we'll leave that for another day.
The most important option we've configured is located under the heading, Place Pro Dada's body content inside the:. For this option, we've selected, tag with css id: and entered in, contentcolumn. How did we figure this out?
One way is to use the HTML Code Inspector in the FireFox Browser. Here's docs on that feature in FireFox:
https://developer.mozilla.org/en-US/docs/Tools/Page_Inspector
Navigate to the page you want to use as the basis for your Magic Template, and find the area in the page you want Dada Mail's content to reside. Right Click/Control Click that area, to open up the contextual menu, and select, Inspect Element. This will open up HTML Code Inspector, showing you the underlying HTML Code in the bottom pane, highlighting the visual results of the code in the upper pane.
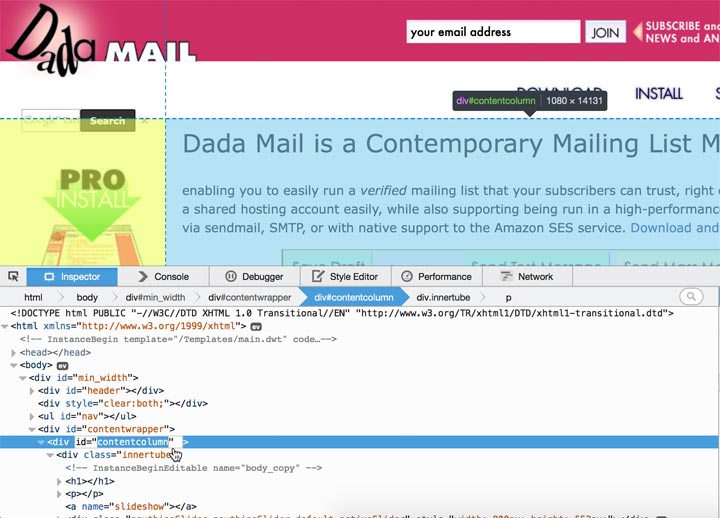
For this site, it looks like the contentcolumn div tag is where we want Dada Mail's content to be, so that's what we'll use. It may take a little trial and error to get the results be exactly what you hope for. Below all these options is a button labeled, Test Your User Template, which will open up a new window to preview the options you've selected.